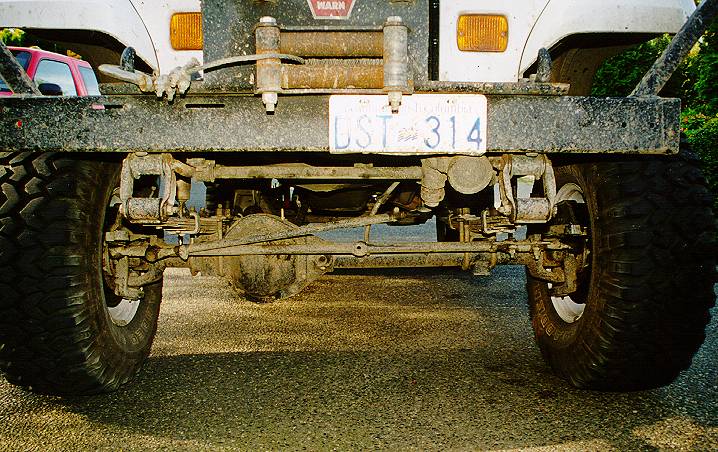
The complex part of axle swaps is the front axle. The front axle
is much more complex than the rear axle because of caster, spring
perch placement, and steering linkage among other things. The front
Scout II Dana 44 is a good fit for a Wrangler YJ though. The work
involved is not as hard as it is time consuming. Doing a spring
over axle conversion (SOA) at the same time adds to complexity,
but it is the time to do it, if you are going to do it.
 I started by completely disassembling the front end. The
diff fluid was very muddy and contained water. I decided to
have all new bearings and seals installed. I wasn't too
disappointed since I only spent $65 on the axles.
I started by completely disassembling the front end. The
diff fluid was very muddy and contained water. I decided to
have all new bearings and seals installed. I wasn't too
disappointed since I only spent $65 on the axles.
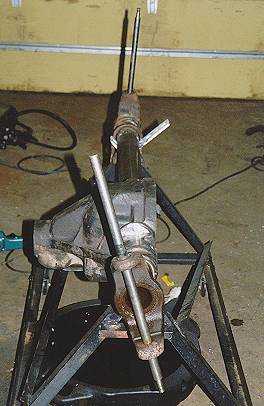
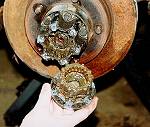
 Before I did installed new bearings and seals, I first had to
address the issue of converting the housing into a spring-over
axle configuration. Because the diff housing is so far to the
side, the only reasonable way to do this was to grind a spring
perch into the top side of the differential housing. The material
to remove is circled in red in the picture to the left. While I
was at it, Rob convinced me to angle this new perch so that the
pinion pointed towards the xfer case output. This provided extra
ground clearance under the pinion yoke and allowed me to use a CV
shaft. Grinding this perch into the housing was
surprisingly easy.
Before I did installed new bearings and seals, I first had to
address the issue of converting the housing into a spring-over
axle configuration. Because the diff housing is so far to the
side, the only reasonable way to do this was to grind a spring
perch into the top side of the differential housing. The material
to remove is circled in red in the picture to the left. While I
was at it, Rob convinced me to angle this new perch so that the
pinion pointed towards the xfer case output. This provided extra
ground clearance under the pinion yoke and allowed me to use a CV
shaft. Grinding this perch into the housing was
surprisingly easy.
Caster
The Scout axle has zero degrees of caster. Tilting the
pinion upwards will result in negative caster. SOA
conversions generally require five degrees or more of
caster. It is for that reason that I had to adjust the axle
yokes' caster. This was an excruciatingly difficult
process.
 I had to carefully grind away the welds which
secured the yokes to the axle tubes and then pound on the
yokes with a heavy hammer. After a lot of grinding and
pounding, I finally got them moved to a decent angle.
In the picture to the left, the foreground is the yoke which
has been set to the new caster angle and the background is
the original caster. Big difference, eh? One thing to be
aware of is that if you set them for too much caster,
the steering arms may be tilted up so much that the
drag link & tie rod will collide with the spring packs
(applies only to SOA setups).
I had to carefully grind away the welds which
secured the yokes to the axle tubes and then pound on the
yokes with a heavy hammer. After a lot of grinding and
pounding, I finally got them moved to a decent angle.
In the picture to the left, the foreground is the yoke which
has been set to the new caster angle and the background is
the original caster. Big difference, eh? One thing to be
aware of is that if you set them for too much caster,
the steering arms may be tilted up so much that the
drag link & tie rod will collide with the spring packs
(applies only to SOA setups).
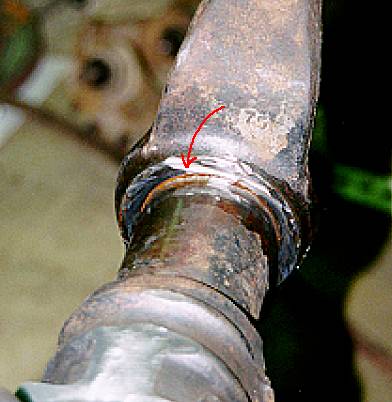
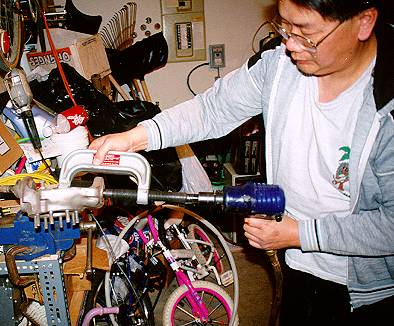
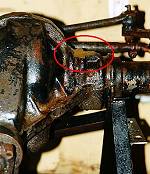
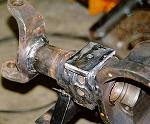
 When adjusting the yoke caster angles, I used an angle grinder
with a thin wheel to grind away the weld securing the yoke to
the axle tube. In the picture to the right you can see the
rust-coloured line which is the seam between the tube & yoke
(indicated by a red arrow). If this line goes right around the tube,
you can begin hammering the yoke to adjust its caster
When adjusting the yoke caster angles, I used an angle grinder
with a thin wheel to grind away the weld securing the yoke to
the axle tube. In the picture to the right you can see the
rust-coloured line which is the seam between the tube & yoke
(indicated by a red arrow). If this line goes right around the tube,
you can begin hammering the yoke to adjust its caster
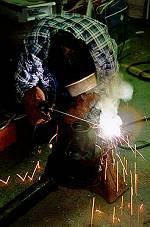
Once the yokes were positioned just right, I had a
professional welder, John Edgar, weld the yokes in place using special
rod which would work with the cast metal in the yokes and the
mild steel of the tubes.
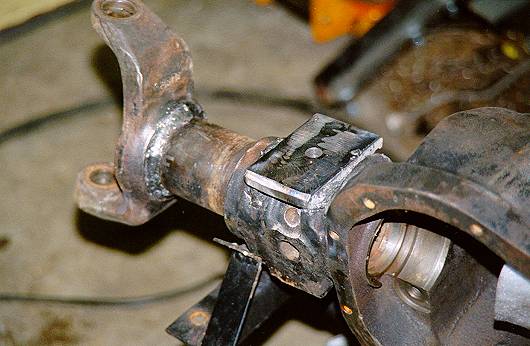
Spring Perches
 I used a half-inch thick piece of plate to serve as the spring
perch on top of the housing. I added four small gussets and then
had John Edgar weld this spring perch to
the cast iron housing. For the driver's side perch, I made one
from square tubing and welded it on myself.
I used a half-inch thick piece of plate to serve as the spring
perch on top of the housing. I added four small gussets and then
had John Edgar weld this spring perch to
the cast iron housing. For the driver's side perch, I made one
from square tubing and welded it on myself.
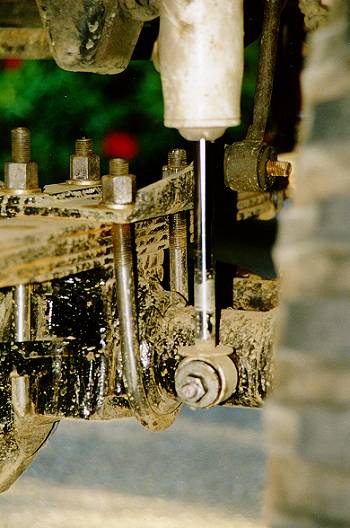
When I bolted the D44 in place I saw how little clearance
there was between the drag link and the leafs when the axle was at
full droop. Basically, the angle was so steep that the drag
link would hit against the passenger-side leaf spring. I
solved this by welding 1/2" tall pads on top of each perch.
This gave me the clearance I needed and I suspect this is
one of the reasons why I didn't have this clearance problem
when I did the Rubicon Express SOA with my stock axles: the
"anti-wrap" perch plates they used provided that 1/2" of
clearance.
Gears and Bearings
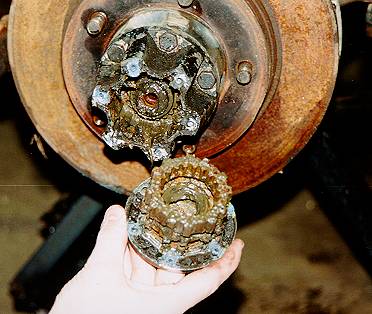
 Replacing the ball joints is extremely easy, if you have
the right tools. Thanks to Ed Mah, I had the right
tools. Using his ball joint installer/remover tool, we
had them changed in less than ten minutes
Replacing the ball joints is extremely easy, if you have
the right tools. Thanks to Ed Mah, I had the right
tools. Using his ball joint installer/remover tool, we
had them changed in less than ten minutes
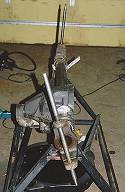
I handed all the pieces plus new bearings, seals, etc to Grant
Klavatalks who re-assembled the front end and ensured that the ring &
pinion gears were correctly setup.
I swapped the stock diff cover for one from a Ford reverse rotation
D44. These covers are designed to be used on the front diffs so
they are flattened in front for added tie rod clearance, they're
approx 1/8" thick for rock protection, and the fill hole is higher up
which is useful if your pinion is tilted high.
Steering
Modifications were needed to use the YJ tie rod and drag link
with the Scout II axle. The Scout II uses a much longer steering
arm on the knuckle and using the stock locations will severely
limit turning radius. These holes are tappered so that the tie
rod fits snug with no play, so a special tappered bit must be
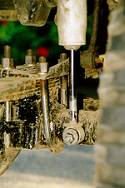
used to ream the holes.
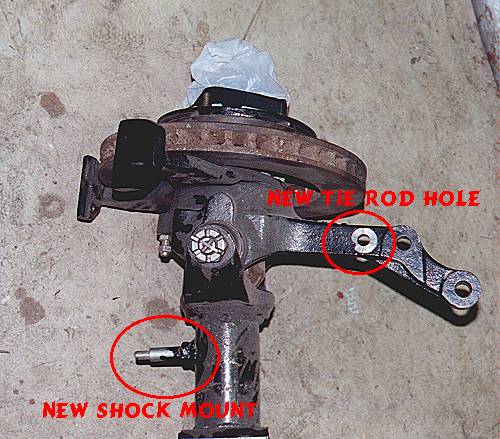
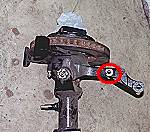 I had new holes drilled and reamed in the steering arms
of the knuckle. This was done so that I could mount my
YJ tie rod six inches from the center of the ball joints
to allow me to use the existing pitman arm without reducing
my turning radius by very much. The new hole I had drilled
for the YJ tie rod is circled in red in the picture to the
right.
I had new holes drilled and reamed in the steering arms
of the knuckle. This was done so that I could mount my
YJ tie rod six inches from the center of the ball joints
to allow me to use the existing pitman arm without reducing
my turning radius by very much. The new hole I had drilled
for the YJ tie rod is circled in red in the picture to the
right.
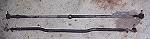 With the new tie rod holes I had drilled into the steering
arms, I was able to use my stock YJ tie rod but I had to get
it shortened by 3 inches. I could've had a thicker one
built but that would have reduced my turning radius because
there is very little clearance between the tie rod and the
front of the diff cover. I was able to re-use the stock
drag link after I screwed the tie rod ends further into the
link, there by reducing its overall length.
With the new tie rod holes I had drilled into the steering
arms, I was able to use my stock YJ tie rod but I had to get
it shortened by 3 inches. I could've had a thicker one
built but that would have reduced my turning radius because
there is very little clearance between the tie rod and the
front of the diff cover. I was able to re-use the stock
drag link after I screwed the tie rod ends further into the
link, there by reducing its overall length.
Brakes
I also bought some 1976 Ford F150 4x4 front
calipers rather than rebuilding the ones which were on the
axle. I used Ford parts because they fit in the axles but
used a smaller brake line fitting which was identical to the
size already used on my YJ.
Shock Mounts
 For shock mounts, I welded some simple studs onto the back
of the housing so that they were perpendicular to the tube.
I welded them directly to the tube because I wanted to
eliminate all the annoying hardware that hung below the
axles. I was planning on raising the upper shock mounts
once I got my Jeep back on the road.
For shock mounts, I welded some simple studs onto the back
of the housing so that they were perpendicular to the tube.
I welded them directly to the tube because I wanted to
eliminate all the annoying hardware that hung below the
axles. I was planning on raising the upper shock mounts
once I got my Jeep back on the road.
Conclusion
Turning radius is almost as good as before. There's just enough
clearance for the drag link under the spring pack. Bump steer
isn't too bad and nothing hangs below the axle housing.