|
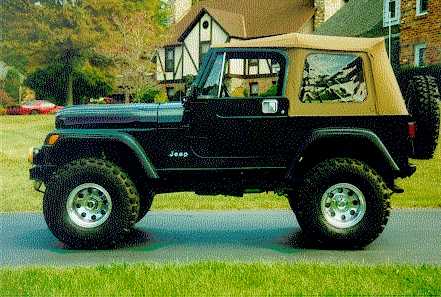
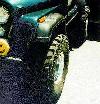
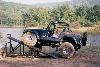
Installing TJ Flares on a CJ
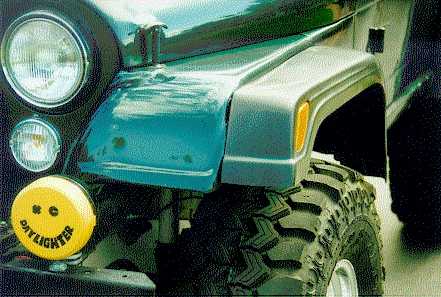
Installing TJ flares on all four corners of my '82 CJ-7 allows
me to run 35x14.5 Swamper SSR's with only a 4" suspension lift and
1" body lift. The TJ fender flares provide more clearance allowing
me to run larger tires without damaging the body. Aftermarket
TJ fender flares come in various widths so there is plenty of
fender covering the tires. The TJ fender flare also utilizes
an integrated marker light that keeps my Jeep street legal even
though I trimmed the fenders.
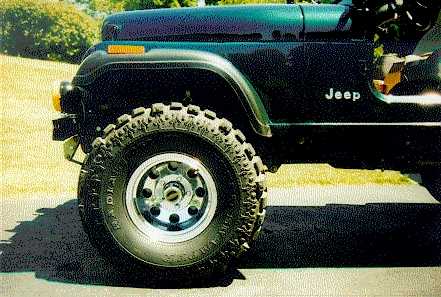
Front Wheel Well
The good part about using YJ or TJ front flares on a CJ is that the
Wrangler front fenders are about 1 1/2" longer than CJ front
fender flares. The extra two inches in length on a Wrangler
fender is located forward of the wheel well. This allows you to
line up a Wrangler flare on a CJ fender with extra room in the
back of the wheel well. The back of the front fender is where you
will hit first with a big tire. The general shape of a Wrangler
rear flare also gives you more room in the rear wheel well.
|
|
|
Before
|
After
|
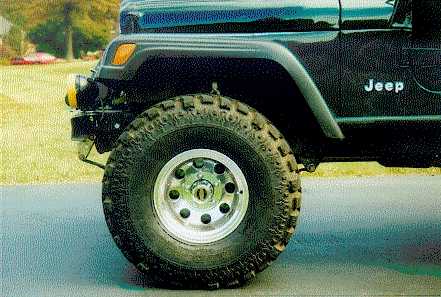
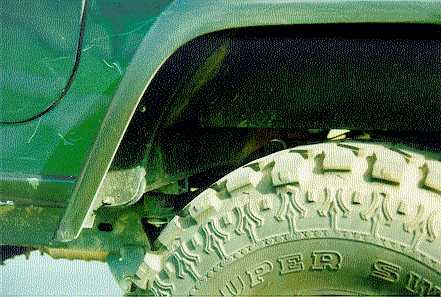
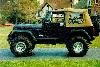
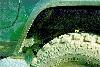
In the photos note where
the rear of the front flare is with respect to the vertical body
seam between the body and the metal fender. The TJ flare at the
bottom of the rocker panel intersects this seam line. The CJ
flare is a good 4-6" forward of this seam. Also notice that the
TJ flare is mounted higher on the fender than the CJ flare. This
is not as easy to see in this photo, but it makes a big
difference.
Now comes the point of no return. Get out the saber saw and
buy a new metal blade with 18-24 teeth per inch. I also found
that hand tin snips were very useful for some of the final
trimming. You have to get yourself in the right frame of mind to
cut your fenders, but once you do the job is really very easy.
Place the front flare up against the fender and adjust back and
forth, up and down, until you fully understand where it is going
to be located. Mark the body with a wax-marking pen so you know
where the flare is to be located. You will be first cutting off
the complete raised ridge, about a 1" wide strip, around the
entire wheel well with the exception of leaving some material at
the front of the fender for mounting the flare. YJ and TJ fenders
need a flat mounting surface plus this gives you more room. You
will be cutting the rear of the wheel well opening flush with the
wheel well liner. You can stop here and mount the flares, but it
is easy to get much more room.
I then carefully separated the wheel well liner from the
fender along the entire rear seam. These are just spot welds.
Drive a screwdriver into the seam to open it up and find the spot
welds. I then took my sazall, slipped the blade into the opened
seam and cut through each spot weld. Obviously the supports from
the firewall to the wheel well liner need to be removed. (So far
I have not replaced them and have been running this way for
several months). I now made a vertical cut about two inches
behind the shock going from the bottom of the wheel well liner up
where it starts to bend over to form the top of the wheel well.
This cut allows the complete rear of the wheel well liner to be
pushed back. I pushed the rear of the wheel well back about 2 1/2
to 3" as measured at the bottom of the saw cut. I then just
pop-riveted a triangular strip of metal over this opening. Be
careful that the final shape of the wheel well liner stays inside
the frame rails, otherwise the tires will chew it up when you are
turning. You will find that the charcoal canister on the drivers
side will need to be relocated, the liner will come very close to
the steering shaft, and the clearance for the clutch linkage may
need to be accounted for.
The passenger's side is a breeze and
there are no interference problems unless you are still using the
stock jack or running a very big battery tray. The fender sheet
metal at the rear of the wheel well was bent over 90 degrees to
lay against the new wheel well liner. I made a couple of cuts so
I was only bending a section about 3-4" long at a time. (I'm
not a body man.) This was pop-riveted to the liner and adds a
fair amount of support to the liner since the fender is double
thickness in this location. Obviously everything was carefully
painted and sealed to prevent rust.
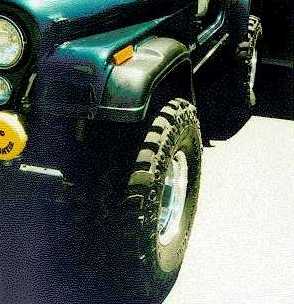
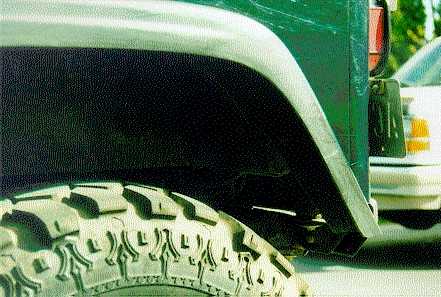
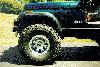
The following two comparison pictures show that the leading
edge of the TJ flare does not mate as nice as the CJ flare. The
top front of the CJ fender has a more gradual bend downward than
the Wrangler fenders. This can be seen in the photo showing the
TJ flare and the fact that it does not mate perfectly to the
fender in the front. Only trained eyes will note this area.
Careful working of the CJ fender, particularly the raised ridge
along the wheel well will minimize flaws in the fit in this
region. The photos also show how much higher the TJ flare can be
mounted compared to the CJ flare.
Details of the front corner of the flares.
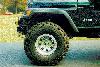
Rear Wheel Well
 The rear wheel well is trivial compared to the front. The YJ
or TJ flare will allow you to trim the sheet metal away from the
front and back lower corners of the rear wheel well due to the
general shape of the flare. This helps most people since they hit
the back edge first. The TJ rear flare has the same general shape
as the YJ flare, but it can be mounted higher than the YJ flare.
My rear TJ flare is mounted in the same position (height wise) as
a CJ or YJ flare. There is over and inch of flare sticking out
below the lower edge of the body, i.e. I could have mounted the
flare at least an inch higher on the body. I didn't mount the
flare higher since you don't hit the top of the rear wheel well
and the bottom opening is monstrous.
The rear wheel well is trivial compared to the front. The YJ
or TJ flare will allow you to trim the sheet metal away from the
front and back lower corners of the rear wheel well due to the
general shape of the flare. This helps most people since they hit
the back edge first. The TJ rear flare has the same general shape
as the YJ flare, but it can be mounted higher than the YJ flare.
My rear TJ flare is mounted in the same position (height wise) as
a CJ or YJ flare. There is over and inch of flare sticking out
below the lower edge of the body, i.e. I could have mounted the
flare at least an inch higher on the body. I didn't mount the
flare higher since you don't hit the top of the rear wheel well
and the bottom opening is monstrous.
 With only minor sheet metal
cutting I have opened up the rear lip enough to clear my tires.
Note: on the rear you are limited on the amount of opening you
can easily do. The front of the rear wheel well defines the
interior of the jeep and where the roll bar mounts. There is a
lip you can trim off on the inside of the wheel well to gain
about 1/2" and there is body sheet metal that can be opened
up. Any more is major work. The rear of the wheel well is
limited by a bent panel, but there is ample room to trim body
sheet metal. Most people don't find the rear wheel well the
limiting factor.
With only minor sheet metal
cutting I have opened up the rear lip enough to clear my tires.
Note: on the rear you are limited on the amount of opening you
can easily do. The front of the rear wheel well defines the
interior of the jeep and where the roll bar mounts. There is a
lip you can trim off on the inside of the wheel well to gain
about 1/2" and there is body sheet metal that can be opened
up. Any more is major work. The rear of the wheel well is
limited by a bent panel, but there is ample room to trim body
sheet metal. Most people don't find the rear wheel well the
limiting factor.
Conclusion
Many are confused when they first see the jeep and think it is a new
TJ since the flares fit so nicely. Only with more careful
observation do I start to get funny looks and people question
what they are seeing. Many have said, "I thought the new
jeep had coil spring." Only true jeep fanatics recognize
what is done.
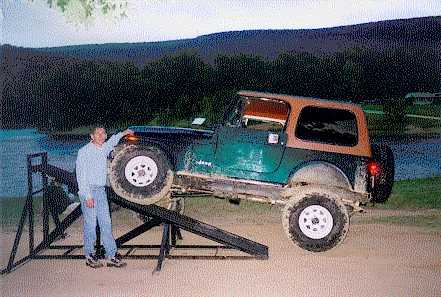
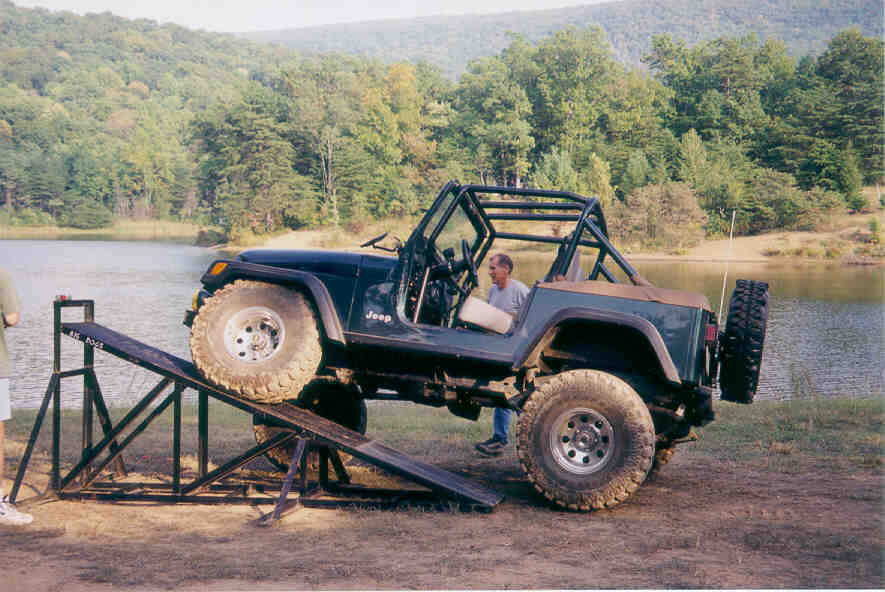
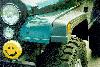
Here are two pictures of the jeep on a
ramp. The first picture was taken when I was running 33" BFG
MTs. Note that the 33" tires completely fill the front wheel
well. The next picture is with the 35" Swamper SSRs. Note
there is more room in the front wheel well with the 35's than
with the 33's!

Contributors
First and foremost, credit goes to Jim Williams who gave me
the confidence to try mounting the TJ flares on my 82 CJ-7.
Second, Gil Meacham who posted some information on Jeep-L
about putting YJ flares on a CJ from his discussions with
John Williams. And also, Jeepskate (aka Rodney Lewis) shared
some information about TJ flares on his mixed vintage jeep.
Last modified Wednesday, 01-Dec-2010 09:17:58 MST
[
Jeep Tech Main Page |
Terry's Jeep Page
]
Copyright © 2001, 2000, 1999, 1998
JEEPTECH.COM
All Rights Reserved, All content with exception of private works and
corporate trademarked logos are property of Jeeptech.com
|